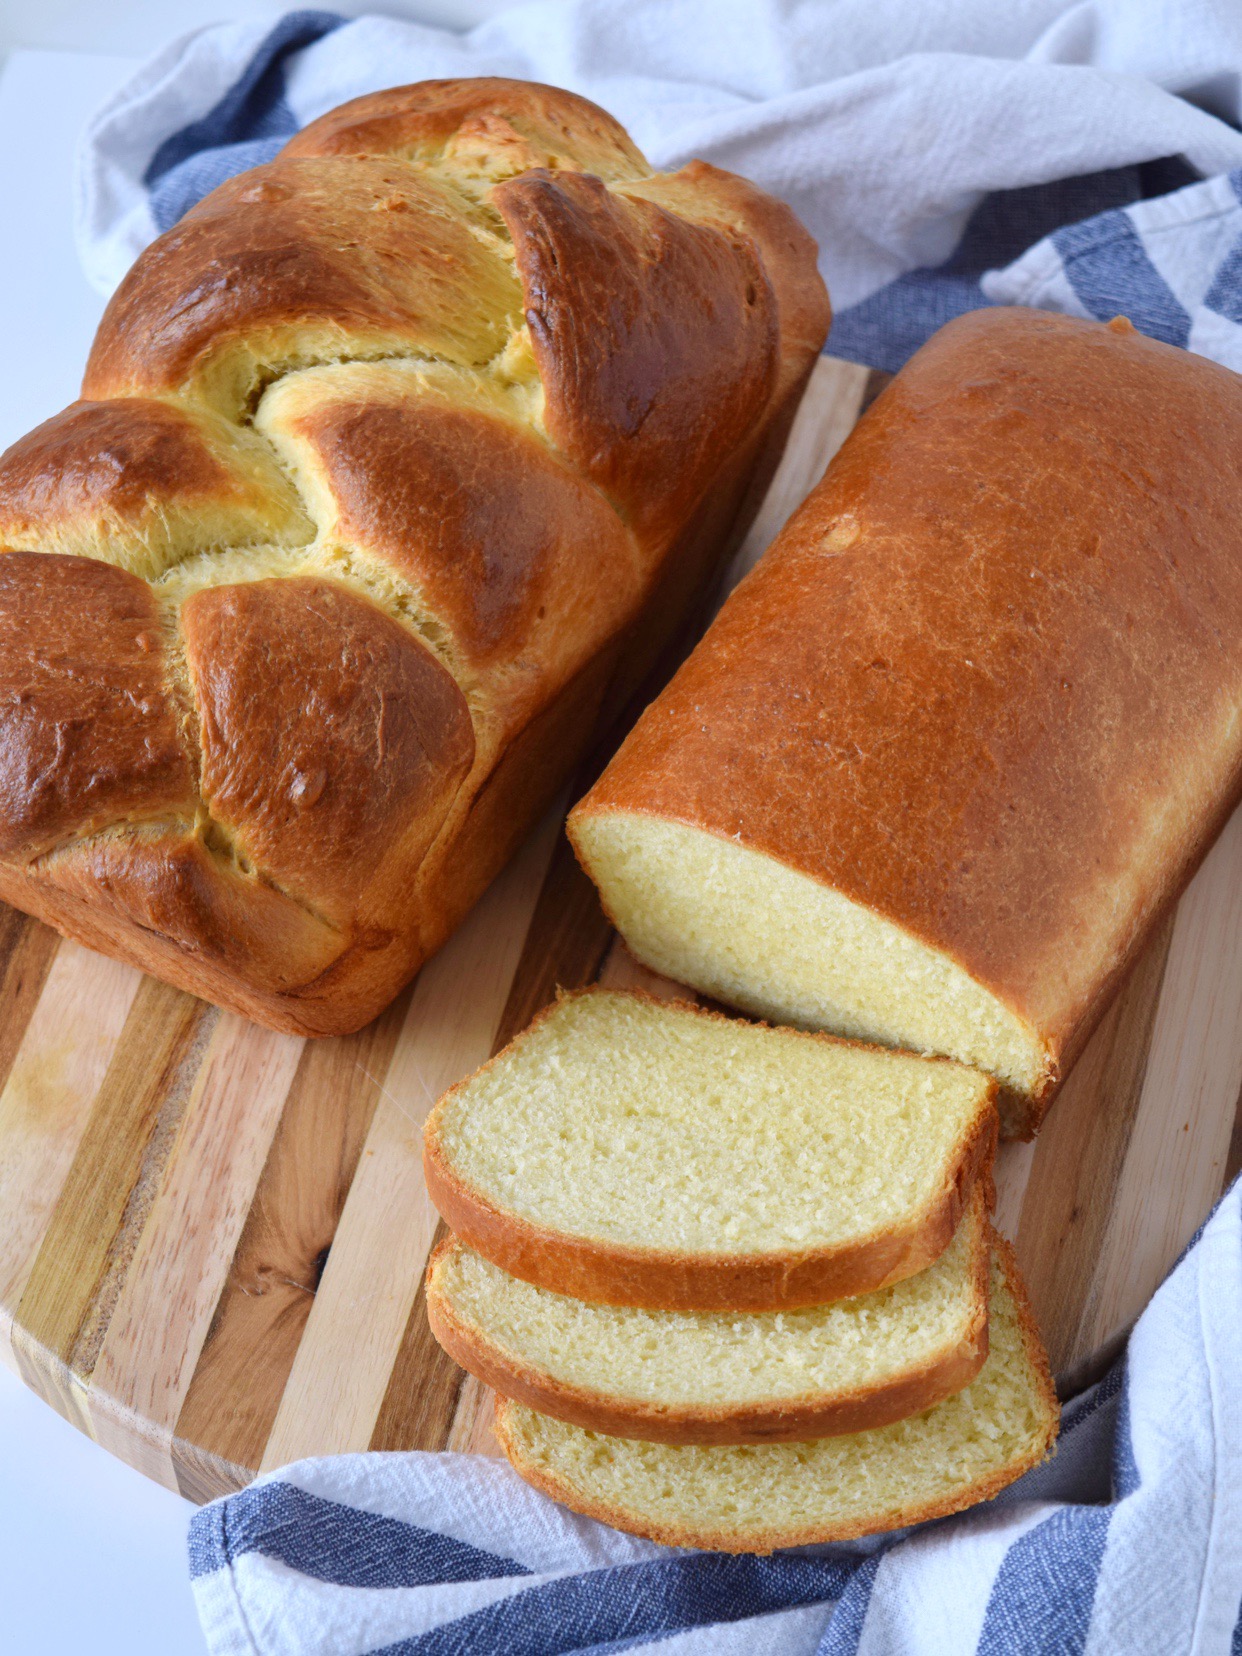
Making this brioche is soooo gratifying! It requires some planning ahead because it takes two days to make, but the result is amazing, fresh, buttery, warm brioche that makes your home smell so, so, so good.
I made this bread twice before I felt like I understood what I was doing, and what mistakes I’d made the first time. On my first try, which was still amazingly delicious, my bread cracked while it baked. It basically over-rose in the oven, meaning it had potentially been under-proved OR I had not sealed the folds well enough, allowing too much room for air to escape. On my second try, I allowed the bread to rise just a little longer than the first time, and I was extra careful to shape my loafs as neatly as possible. These two tweaks resulted in a better structured bread that just looked “right”. I also shaped my bread using as little flour as possible, even though it is a sticky dough to work with, but that helped me better seal the loafs because sticky dough sticks better than dry dough.
If you give this bread a go, which I HIGHLY recommend you do, you’ll feel so good about yourself! Just go in knowing you might have to make it a couple of times before you get that “picture-perfect” loaf. Even if it doesn’t look the prettiest, it will still taste better than anything you could buy and your home will smell like fresh bread for days.
If you have any questions, let me know! I based my recipe and technique off of two other recipes on the internet, and had to do a bit of extra research to figure out what I could do better the second time.

BRIOCHE BREAD LOAF
ingredients:
- 1 cup room temperature salted butter
- 6 room temperature eggs
- 1 tablespoon active dry yeast
- 1/4 cup granulated sugar
- 1/2 cup warm water
- 4 3/4 cups all-purpose flour
instructions:
How to cook BRIOCHE BREAD LOAF
- In a stand mixer with a paddle attachment, mix together 1 cup flour, the yeast, and sugar. Then add the water and mix on low-medium speed until well-combined.
- Add and mix in one egg at a time until well combined.
- Incrementally add 2 cups of flour, only adding the next increment until the last has been mixed well. About 1/4 cup at a time.
- Cut the butter into 6 chunks and add each chunk one at a time. Mix until each is well combined.
- Finally add in the remaining flour in increments, mixing thoroughly between each increment.
- Scrape the paddle and sides of the bowl. Then cover with plastic wrap.
- Microwave a mug of water for about 1 minute. Place the covered dough in the microwave with the hot mug of water.
- Leave it to prove for about 1 1/2 hours or until the dough has doubled in size.
- Once the dough has doubled, punch it down with a spatula until it's mostly deflated, and scrape the sides of the bowl.
- Spray the sides of the bowl and the top of the dough with non-stick baking spray. Cover again, tightly, with plastic wrap, and place in the fridge overnight. Do not remove the plastic wrap as the dough will continue to rise in the fridge.
- Remove the dough from the fridge, uncover and let sit about 10 minutes.
- Spray your work surface with non-stick baking spray, and have a few tablespoons of flour on hand incase you need to flour your surface.
- Divide the dough in half and begin shaping your first loaf.
- For a traditional loaf shape, roll one half of the dough into a rectangle. Fold into thirds and then fold in either end.
- Pinch the folds so that you seal all of the openings.
- Grease a loaf pan with non-stick baking spray, and place the shaped loaf in it. It should fit snugly.
- For a braided loaf, roll half of the dough into a rectangle. Using a pizza cutter, cut 3 even strips lengthwise, and press the three strips together at one end.
- Braid the strips snugly and pinch the ends together when you reach the end of the braid.
- Turn the braided dough over, bottom up, and fold in the pinched ends. Continue to pinch and seal the bottom end of the braid so that there aren't any openings on the bottom.
- Turn the dough over and gently place it in a greased loaf pan, making sure to keep all the folded and pinched ends tucked under the loaf. If the braid is too long, gently squish it together to shape it so it snugly fits in the pan.
- Cover both shaped loafs in plastic wrap, and lightly spray the tops with baking spray so the plastic wrap won't stick.
- Prove in the microwave using the same method used on Day 1, until the dough has doubled in size.
- Preheat the oven to 350 degrees.
- Before baking, brush the tops of the loaves with an egg wash (1 beaten egg + 1 tablespoon water).
- Bake for 40-45 minutes. Promptly remove the loaves from their pans and let cool on a rack for 20 minutes before slicing.


